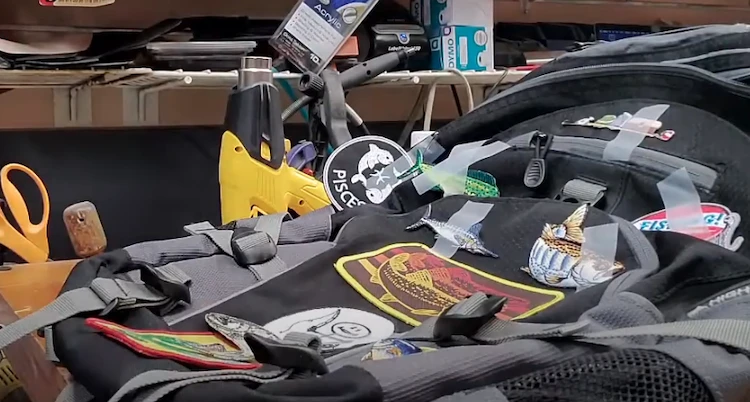
Backpacks are fantastic for exhibiting your favorite patches with whichever outfit you decide to model that day, whether store-bought or homemade.
Transform your worn out backpack into a trendy accessory by reading this patch-sewing tutorial. Learn to accessorise or fix your backpack and make it look like new again!
Depending on patch type, there are various ways of attaching it. You can either iron glue your patches or sew them on.
For hand sewn patches, the following items and tools are needed:
- A sewing needle or sewing machine
- A thimble (optional),
- Safety pins
- Scissors
- Clothing iron
- Press cloth
This is a more time-consuming option. But for old school lovers, this is a fun way to beautify backpacks.
Design or buy a patch
Many stores and online shops offer patches. You can order custom patches without the trouble of making one yourself, however, If you happen not to like any of them, here’s how to make custom patches designed by you!
If you wish to design your custom patch, remember to select the proper patch type.
Choose a spot for your patch
Decide where the patch is to go. We recommend avoiding areas with seams, this is because you’ll have trouble stitching through them. Nonetheless, it isn’t impossible, so go for it if this is your wish.
Examine the type of your patch
Determine whether the patch’s backing is heat-activated. A patch doesn’t need adhesive to be sewn on. However, why not improve the strength by combining the adhesive with stitches?
Prepare your backpack
Wash and thoroughly dry the backpack. Spread it on a flat, hard surface, such as a table.
This is the time to put your sticker on the previously chosen spot to make sure this is the place you want to sew it on.
Cover the patch area
Use cotton fabric to cover the area where you intend to sew your patch.
Iron the cotton fabric
Preheat your iron to a cotton setting. Press the iron on the fabric and heat up the backpack fabric.
Place the patch on a backpack
Remove the cotton cloth and place your patch on the heated area of the backpack material.
Drape and iron the patch
Overlay the previously heated cotton material over the patch.
Push directly on the patch using a scorching iron for about 1 minute.
Remove the iron
Raise the iron to check if the patch stuck thoroughly on the backpack.
If it is loose, cover it with the cotton fabric and iron that area again.
How To Sew A Patch On A Backpack By Hand
Sewing on a patch by hand is a time-consuming but original method. Follow this step-by-step guide to learn how it’s done.
1. Pinning the Patch
Secure the patch onto the backpack using fabric pins. Insert the pin through the patch and the backpack material, then back through both again to keep it in place. This provides a safer option compared to relying solely on adhesive backing.
2. Choosing the Thread Color
When selecting the thread color for your patch, it’s essential to think about how it complements the backpack material. The right thread color can either seamlessly blend with the fabric, providing a harmonious look, or create an eye-catching contrast, giving your patch a unique and stylish appearance.
- Harmonious Blend: If you want the patch to merge naturally with the backpack’s material, opt for a thread color that closely matches the background color. This creates a subtle and cohesive look, perfect for a seamless integration of the patch into the backpack’s design.
- Contrasting Pop: To make your patch stand out and add a dash of personality, choose a thread color that contrasts with the backpack material. This can draw attention to the patch and make it a focal point of your backpack. Selecting a complementary but contrasting color can be an excellent way to make a statement.
Consider the overall style you want to achieve, whether it’s a subtle addition or a bold and eye-catching detail. Remember, the choice of thread color allows you to personalize your patch and create a look that’s entirely your own.
3. Preparing the Needle
Before you start sewing, it’s crucial to prepare your needle properly. An overlooked but essential aspect is creating a secure knot. This initial knot, as mentioned in step 4, plays a pivotal role in preventing the thread from slipping through the fabric while you sew. This ensures the longevity and stability of your hand-sewn patch!
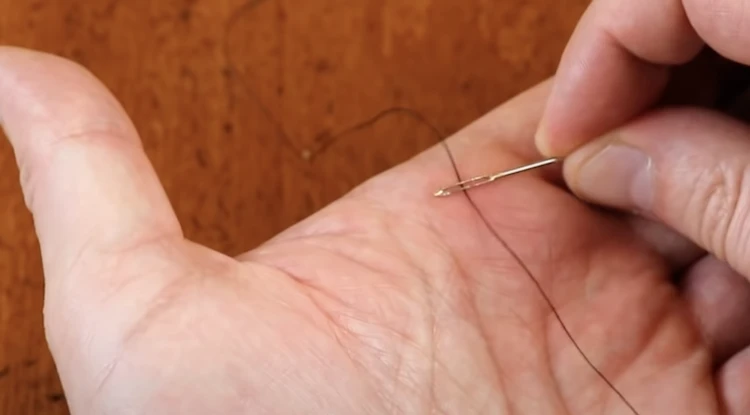
Not only that, a secure knot at the beginning of your stitching provides an extra layer of protection against unraveling and if done correctly, ensures a neat and professional finish, which is particularly important if you want your patch to look polished and well-crafted.
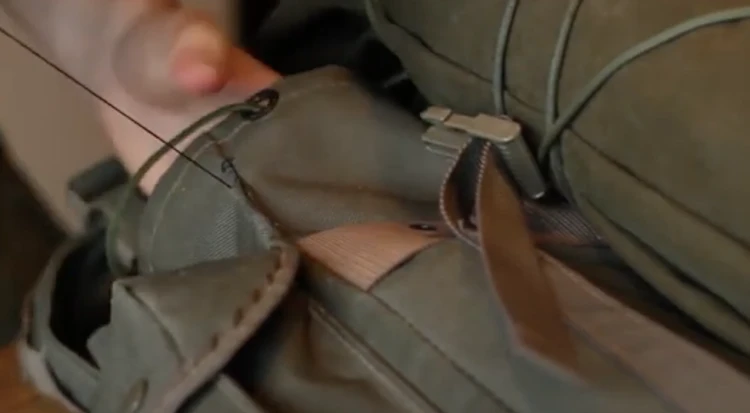
4. Sewing the Patch
Using a thimble for safety, start sewing by pushing the needle through the inside of the backpack, aligning it with the patch on the front. Stitch back to the inside and repeat until the entire patch is sewn.
Tip: To ensure your hand-sewn patch looks clean and professional, it’s important to maintain consistent stitch lengths. Uneven stitches can detract from the overall aesthetics of your patch. To achieve this, consider using a ruler or your fingers as a spacing guide
This technique is called a running stitch. Adjust the position of the needle as needed to achieve straight stitches along the patch border.
5. Finishing Touches
Once you’ve sewn the entire patch and ensured it’s securely attached, flip the backpack inside out to reveal the outline of the patch. Create an overhand loop at the end of your stitching:
- Leave a small noose on the inside of the bag.
- Pass the needle through the loop from the outside.
- Pull it tight.
- Repeat the process 3 to 4 times.
Once you’ve completed sewing the entire patch and ensured it’s securely attached, the overhand loop, as described in this step, plays a crucial role in ensuring the patch remains securely attached over time.
This simple yet effective technique adds an extra layer of durability to your hand-sewn patch. The overhand loop reinforces the stitching at the end, preventing any potential unraveling and ensuring the long-lasting integrity of your patch. This step, not only completes the sewing process; you’re also enhancing the patch’s ability to withstand wear and tear.
6. Final touch
As you approach the final stages of hand-sewing your patch, take a moment to inspect your work closely. If you notice any loose stitches or areas where the patch isn’t fully secured, reinforce them by re-stitching with matching thread, ensuring even stitch lengths, and finishing with a secure knot.
This added step enhances the patch’s durability and ensures long-lasting attachment, maintaining the overall quality of your hand-sewn patch on your backpack.
How To Sew A Patch On A Backpack Using A Sewing Machine
Happen to have a sewing machine at home and don’t want to glue your sticker? Then say hooray!
In the next part of this step-by-step guide, we explain how to do exactly that!
1. Position your patch
Place your patch in the desired location on your backpack, securing it with fabric pins. These pins will hold the patch in place during sewing. Leave the pin heads to the right, making it easy to remove them as you sew.
2. Sewing machine setup
To ensure a secure attachment, opt for a zig-zag stitch instead of a straight stitch when sewing on a patch. This stitch type provides greater stability. Adjust the width of the stitches so they match the size of your patch. Using a “B foot” is recommended for this machine sewing process.
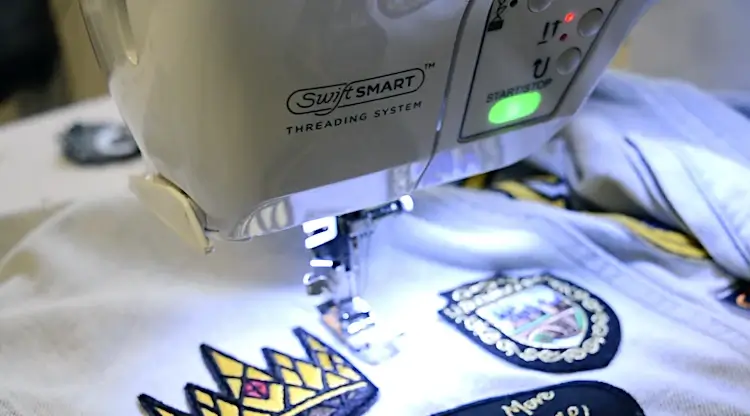
3. Start sewing
Once your machine is set up, it’s time to begin sewing. Lower the presser foot before making the first stitch. Use the foot pedal to control the machine’s sewing speed.
4. Stitch adjustment
If you need to change the direction of your stitches, ensure the needle remains within the backpack fabric while making adjustments. This precaution prevents the patch from shifting. Stay as close to the patch’s edge as possible.
While it’s easier to sew a patch with a straight edge, you can achieve excellent results with some patience and effort.
5. Create a back stitch
After completing the sewing, reinforce the attachment by creating a backstitch. This technique strengthens the patch’s connection, prevents loose ends and unravelling of the thread.
6. Trim excess thread
Many modern sewing machines have a built-in cut option. However, if your machine lacks this feature, you can manually trim excess thread. Raise the presser foot to its highest position, pull the thread taut, and cut it with a pair of embroidery scissors for a clean cut.
Sewing tips for different patch types
| Patch Material | Thread Type | Thread Weight | Needle Size | Stitch Type |
|---|---|---|---|---|
| Fabric | Cotton / Polyester | 40-60 wt | 70/10 – 80/12 | Straight |
| Leather | Waxed Polyester / Nylon | 69-138 wt | 90/14 – 110/18 | Saddle |
| Vinyl | Polyester or Nylon | 40-92 wt | 80/12 – 110/18 | Straight / Zigzag |
| Rubber | Heavy-Duty Polyester | 69-138 wt | 100/16 – 120/20 | Lockstitch |
How To Iron On A Patch To A Backpack
Clearly this method doesn’t entail any form of sewing, but we thought it is worth a mention, as not everyone can hand sew or use a sewing machine.
You can tell if the patch is iron on by examining the back. If there’s a layer of coating, that’s the adhesive that is heat sensitive which causes it to go stick once heat and pressure is applied.
Consider the material of the patch and the backpack. Some materials like nylon easily melts. Have the iron on too high and you risk ruining either you patch or backpack (or both).
This video demonstrates how easy it is to iron on patches. Although it doesn’t shows the process being done on a backpack, the process is exactly the same!
Remember though, relying only on adhesive means the patch will eventaully fall off due to the flexing of the fabric. A solution is to sew it on after it’s stuck in place. Not only will this give it added strength, but the patch will not move around while the sewing process is taking place (either by hand or machine).
Selecting The Right Method For You
Having various ways of attaching a patch to a backpack is handy. It gives you a choice of discovering which manner suits you best.
Using a sewing machine will create a more refined and tidy finish, not to mention being able to complete the job quicker. Sewing machines are great for saving time and therefore perfect for larger jobs. However, not everyone knows how to use them, which is why some people opt for the hand sewing option.
On the other hand, iron on patches are the quickest of methods for adding patches, but they do not last as long and come loose sooner than the two sewing on methods mentioned on this article.
I would even go as far as to say to try all three methods (if you can). Pick what suits your requirement so you can give your backpack a fresh new look and personalize it to your own unique style!
Expanded Responses to Frequently Requested Questions
Q1. How can you attach a patch on a backpack?
There are 3 options: You either glue your patch onto a backpack or sew it using thread and needle or a sewing machine. The choice is all yours!
Q2. What stitch is best for patches?
Depending on how you plan to attach your patch onto a backpack, you can use two types of stitches.
If you go with hand sewing your patch, you should probably use a straight stitch because it will be easier for you to sew. On the other hand, if you want to machine sew your patch, you should go ahead and make it more secure with a zig-zag stitch.
It is important to keep your stitch close to the edge of your patch, no matter the sewing option.
Q3. Where should you sew patches?
It doesn’t really matter where you should sew patches onto a backpack. You can put them on the inside of your bag; you should only be careful and don’t make your loop visible on the outside. You can easily avoid this if you hand sew a patch onto a backpack because it’s much easier to control the backpack and patch movement while working.
Q4. Should you put a patch on a new backpack?
If you don’t like your new bag because it is too plain, you can always make a couple of stitches and attach some cool patch onto it. We don’t recommend gluing anything on a new backpack because you can’t take it off later; You can always cut the stitches off without anyone noticing!
Q5. What to do if the patch is too thick?
If you have a problem hand sewing your patch because it’s too thick, you can ether glue it on a backpack or use a machine to sew it on; If there is no glue on the back of the patch, and you don’t have a machine at home, try reaching someone who possesses one, or going to the tailor to ask for help. Try not to waste your time trying to hand sew the thick patch onto a bag, because you will have trouble to push the needle through both the material and the sticker.