Using custom patches is one of the most cost-effective ways to mark a uniform, personalize clothing, and elevate your style!
Make a lasting impression by unleashing your inner designer and bring your unique style to life with custom patches made from your own imagination.
Key Takeaways
Choosing and creating a design
Create your own design or use a pre-existing image. A pre-existing image will save you time, but it’s always an idea to edit it, so you aren’t infringing on copyrights.
Cut out your patch
When it’s time to cut out your patch, you can use your design as a guide. This way you can trace it onto the fabric and cut it out to make sure everything fits perfectly.
Attaching your patch to your garment
There are three ways of attaching your patch to your garment. Use a needle and thread, iron-on backing or use fabric glue. The method that works best is a combination of needle & thread and fabric glue.
In today’s article, we cover everything you need to know on how to make such custom patches!
Creating Your Own Custom Patches
Thanks to advancements in manufacturing processes, the cost of patches has significantly decreased, making it a budget-friendly option even for small-scale users.
But the real excitement lies in the wide range of eye-catching styles available today. To help navigate through this vibrant landscape and find the perfect style for your company or DIY project, we’ve prepared a comprehensive guide. Discover an overview of each style, suggestions on logo placement, along with design tips.
Having a variety of patch styles to choose from presents unique design challenges. In this section, we cover their individual features and design concepts.
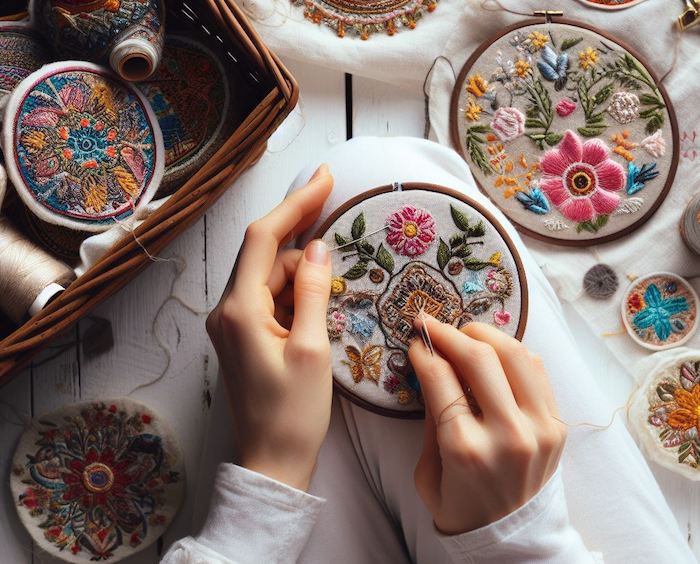
1. Crafting distinctive embroidered patches
Custom embroidered patches offer the same distinctive look as traditional embroidery but at a significantly lower cost. Designed to withstand industrial washing, these patches are crafted using high-quality, color-resistant polyester threads and textiles.
Watch this video: Making Patches On An Embroidery Machine [11 mins 51 secs]
With a wide range of custom shapes and sizes available, embroidered patches provide an excellent means to personalize clothing, bags, and headgear.
Advantages
– Durable for outwear.
– Color resistant thread.
– Large color range.
Considerations
– More expensive.
– Limitation in details.
2. Adding depth and dimension with 3D embroidered patches
3D embroidered patches use an EVA foam layer behind the stitching. This is what gives them their third dimension. Selecting focus areas that are prominent on the patch can result in a striking visual effect. This design has gained a lot of traction in the sportswear and team hat markets.
Advantages
– Used in sportswear.
Considerations
3. Unleashing vivid colors & intricate detail with sublimated patches
Printing with sublimation begins with white material and permanently dye it. This provides a wide range of color options and high detail. They are also iron-on patches. To reproduce photorealistic images, logos, gradients, and delicate mixes, sublimated patches are ideal. Unlike an embroidered patch, they’re less likely to tear over time, but the color doesn’t tend to last as long.
Advantages
– Versatile application.
Considerations
4. Print stitch patches – the sublimation / embroidered combination
This is a combination of embroidery and sublimation that makes stitch patches. Using a photographic image, the backdrop is printed in full color and embossed to add depth and texture.
Watch this video: The Ins & Outs Of Print Stitch Patches [03 mins 21 secs]
This patch provides photorealism and texture for a variety of applications. A satin stitch is the most often recommended.
Advantages
– Texture & depth.
Considerations
5. Enhancing style with soft and flexible rubber patches
Insignia made of rubber patches, also known as PVC patches, is the newest trend and technology in the industry. Everyone is fascinated by their unique, soft, flexible, and three-dimensional feel. A patch like this, with its sleek, contemporary, and branded appearance, can enhance any product. These patches can be peel and stick type as well. These sticky patches are far cheaper in comparison to embroidered patches.
Advantages
– Three-dimensional.
– Modern appearance.
– Material versatility.
Considerations
6. Leather patches for timeless style
It’s best to go with leather patches if you’re going for a simple, rustic look. Laser etching creates a unique monochromatic look for these patches, which are available in both real and faux (fake) materials. They can also be paired with a wide range of outfits. Genuine leather cannot be cleaned, despite the fact that faux leather patches can.
Advantages
– Pair on range of outfits.
Considerations
7. FlexStyle framework patches
This year’s latest fashion trend when it comes to custom patch design is the FlexStyle patch.

Patches with FlexStyle textures are flexible and soft, giving your insignia a richer, more dynamic appearance.
FlexStyle offers a versatile application beyond clothing, making it suitable for various apparel with challenging angles, like baseball caps. It’s the perfect alternative to attaching patches to caps and makes customization a breeze.
It’s a sticker on steroids!
Advantages
– Good on angles.
– 3D raise texture.
– Enhanced visual appeal.
Considerations
How To Make Custom Patches?
You’re probably already familiar with custom patches. You’ve probably seen fire department patches or a custom military patch many times. If you want to make something similar to those custom patches, this is what you’ll need to do.
Step 1: Patch design concept
To create custom patches, start with a strong concept or theme that appeals to your target audience. A well-designed patch will attract more buyers, so invest time in developing a unique concept. If you need inspiration, check out our article on creative patch design ideas or browse pre-made designs online.
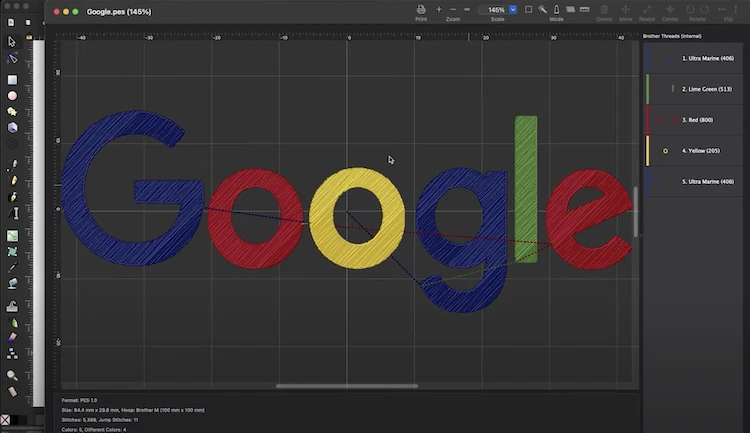
Step 2: Have the design digitized
Embroidery machines require digitized files to stitch out the pattern. Digitization is like an instruction manual for the machine, ensuring it can accurately reproduce your design. ColDesi Graphics can help convert your creative ideas into production-ready files compatible with embroidery machines. Consider the file format requirements of your specific machine, and if needed, watch a helpful video on digitization.
That’s it! With a strong design concept and digitized files, you’re ready to bring your custom patches to life.
Watch video: 2 Ways To Digitise Images For Embroidery [11 mins 51 secs]
The next step in the process is to go shopping for patch material.
Step 3: Select a patch fabric
When it’s time to choose the fabric for your custom patches, Colman and Company offers a wide range of options to meet your needs. Two popular choices are Patch Twill and Patch Material.
Patch Twill is a 100% polyester material that comes in rolls, free from flaws or interruptions. It requires no preparation and is ready to use right away.
Patch Material, on the other hand, is a thinner and lighter option that comes rolled up with a special adhesive coating on the back. While it offers easier usability, it may require stabilization with heat spun due to its lighter weight.
Consider the characteristics and requirements of each fabric option to make an informed decision that aligns with your custom patches and business goals.
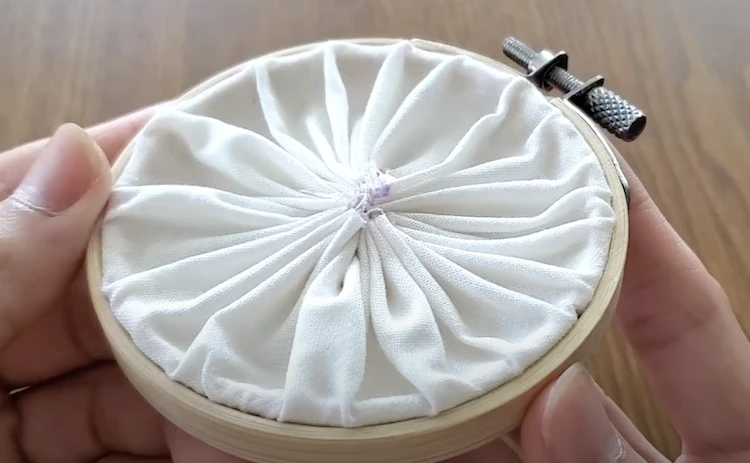
Step 4: Sew a hoop
Once your custom patch design is ready and the patch material is cut to size, it’s time to hoop the foundation cloth. Use the hoops included with your embroidery machine for this step.
If you’re using Avancé embroidery machines, consider using the Allied Gridlock Hoops for enhanced functionality with built-in gridlines and adjustable screws.
Simply align the fabric in the embroidery hoop to make it taut and ready for embroidery. The number of steps may vary based on the patch fabric chosen.
If you’re using patch material, apply heat spun to make it more stable before hooping. Use a heat press to apply the heat-spun layer to the backside of the patch material.
For adhesive backing, apply Tempo Spray to secure the backing to the patch material’s backside before hooping.
With Patch Twill, you can skip additional steps and begin hooping right away. Once you’ve finished stitching and hooping the patch, your embroidery machine is ready to use. Choose between a zigzag stitch or a blanket stitch depending on the shape and design.
After completing the tracing and checking for accuracy, proceed to the next step of applying heat sealant, which will be covered in detail.
By condensing the information and focusing on the key steps, we have reduced the fluff while maintaining the essential instructions.
Step 5: Use heat sealing to put it in place
Once the patch is removed from the machine and turned over, the thread and stitches become visible.
To seal the threads at the back, Heat Seal is used. It comes in paper format with a glue layer on one side. For Patch Twill or Patch Material, both textiles need to be heat sealed.
Watch video: Attaching Heat Seal To A Patch [05 mins 21 secs]
To create a clean edge and hide imperfections, sand down the surface before cutting around the patch. Cut a piece of heat seal matching the patch’s dimensions. Place a standard finishing sheet on the bottom platen of the heat press.
Ensure the patch is facing you and sandwich it and the heat seal between the other half of the finishing sheet and the top layer of the heat seal. Press for 10 to 20 seconds, then remove.
As the heat seal adhesive hardens and adheres to the patch, allow it to cool. Once cooled, proceed to remove the patch.
Step 6: Cut your patch
The next step is to remove the patch from the surrounding material using a Hot Knife, which provides a hot cut edge. Make sure the hot knife is warmed up and begin the procedure.
Work on a transparent surface to ensure safety. The hot knife will not burn or pass through glass at these temperatures.
Using a smooth motion, trace the edges of the patch with the hot knife. The patch will start separating from the surrounding waste, although there may still be some excess material.
To fix this, use the hot knife’s barrel to melt the remaining rough material around the patch’s perimeter. Now, with the patch’s heat seal reversed, it’s ready to be heated and applied to any clothing item of your choice.
The possibilities are endless! With the right supplies and tools, custom patches can be a fun and profitable option for your customers. You’ll have a finished patch in no time.
Watch this video: Making embroidery iron on patches [11 mins 50 secs]
Which Applications Are Recommended For Which Types Of Patches?
If you want to make DIY patches easy and without any trouble, you’ll have to know which applications are recommended for what. Your custom patches will look much better if you stitch them the right way.
Embroidered patches
Embroidered patches are ideal for uniforms (police, army, etc.) and high-end accessories like coats, hats, and bags to use for embroidery patches. A custom embroidered patch can really elevate the look of your uniform.
It is a good idea to hand out woven patches at events. By having all of your volunteers wear the woven patches on their uniforms, you can add a personal touch to an event. For clothing, jeans, hats, and bags, custom embroidered patches can be used as unique embellishments.
Printed design patches
In situations where a single patch can convey a lot of information, printed patches are ideal. Printed patches are easy to apply. You can sew them on or iron them.
Leather patchwork
T-shirt pockets, canvas and twill textured items, different headwear, and bags can all benefit from the addition of leather patches.
PVC-based patches
PVC patches are a great option for a variety of organizations, including sports teams, airsoft groups, scouting groups, and so on. It is possible to use PVC patches for almost any purpose because they are both versatile and fashionable. PVC patches come in a wide variety of colors and designs as well.
Garlands of golden hair
Anyone can wear a bullion patch, but the following groups are among the most common.
Service in the Armed Forces (Army, Navy, Air Force, Marines, National Guard)
- Sports Organizations
- Restaurant and Security Personnel
- Genealogical Societies and Groups
- Non-Profit Organizations & Groups
- Distinguished Clubs
Tips For Making Custom Patches That Stand Out
A good custom patch can be made even better by following a few simple patch design principles. Take a look at some of these suggestions.
Your custom patch design can make your business and your brand stand out.
- Clarify the design: Finely detailed images don’t translate well to small patches. The best patch designs are those that are simple, clean, and bold.
- Remove small text: Omit the tiniest type if it’s not essential to the message or logo (or increase the font size if possible). The text may not print properly or be legible.
- Consider the foreground & border: The overall appearance and colors of your patch is influenced by the color and style of the background and border.
- Choose the right shape: A custom die-cut shape will enhance your design, but a standard shape could work just as well. If you’re going for a distinctive appearance, a custom shape is a great choice for upping the “wow” factor.
Conclusion
We can’t tell you which technique of patches customisation you will like the most. But by trying out a handful of these on this article, you will find your favorite. It is a matter of getting a feel of what you like best and what process suits your character. After all, you must enjoy what you are doing in order to do it well.
Patches are once again becoming extremely popular. It is a fantastic way to be unique and stand out from the rest. It also demonstrates your artistic side as people will know the design is custom made and not mass produced. Gone are the days where status reflected wearing high end brands!
Uniqueness is the new fashion, and it is about time!
Expertly Answering Your Common Questions
Q1. Is it better to sew or iron on a patch?
Sew on patches take longer to create, but they do add flexibility to the garment it is being attached to, where as iron on patches are stiffer but also easier to apply. Overall it is a matter of time before the glue on iron on patches lose it, so sew on patches tend to last longer, unless you sew on the iron on patch too!
Q2. Which material is best for patches?
Any sturdy material will be decent for making patches from. However, the most preferred material choice is felt due to the fact the edges don’t fray. Less edge finishing is also required and therefore less chance of the stitching coming loose.