It’s not unusual to have to remove embroidery with backing. It may be that your sewing machine won’t stitch through the backing or it may be a new item that you are having trouble attaching to a piece of fabric.
Either way, you’ll need to remove the backing to complete the job. When it comes to embroidery, it’s not always simple to figure out how you can get the backing off the embroidery to reuse the stock.
This article explains how you can remove the backing while leaving the embroidery in place. This is ideal if you want to turn your embroidery into a patch or a sticker.
Key Takeaways
Backing removal
The backing to embroidery is also known as a stabilizer. This is the first thing that needs removing before anything else.
The majority of this can be done by hand (or picked away with your seam ripper). Ultimately this will also prevent your razor from clogging when it’s used to cut away at the embroidery.
Tackle bobbin threads frist
The bobbin threads are the main outer threads that lock in place the stitches. Use your razor to cutaway at the bobbin threads. This as a result will loosen the stitches from the front.
Use a lint roller
Removing embroidery stitches will be a messy process. Use a lint roller intermittently to pick up the removed stitches. This will allow you to continue the removal process without debris getting in your way!
Tips On How To Remove Embroidery With Backing
When embroidery is done, it is common for there to be some backing and embroidery thread left on the fabric. This is because the backing is necessary to stabilize the fabric during the embroidery process.
When you finish an embroidery project, the final step is to remove machine embroidery. If you’re not careful, you can damage the fabric or the embroidery itself if you don’t use an embroidery removal tool.
Here are some tips to help you remove the backing safely and easily:
Identify the type of backing that was used. This will determine the best method to remove embroidery. If the backing is water-soluble, you can soak it in warm water until it dissolves. If the backing is heat-activated, you can use a steam iron.
- First, you will need a sharp pair of scissors.
- Second, you will need to be careful not to cut the fabric.
- Trimming excess embroidery backing around the design’s perimeter.
- Peel back embroidery backing gently, avoid pulling on stitches.
- If you encounter resistance, stop and trim the backing in that spot.
- Once backing is removed, remove loose threads (lint roller).
- Finally, you will need to iron the area to remove any wrinkles.
With a little patience, you’ll have your embroidery removed in no time!
Embroidery Removal Tools
There are many tools available to help you remove embroidery. Some are as simple as a pair of scissors, while others are more specialized like an embroidery hoop.
The most common is to use a seam ripper, which is a small, sharp tool that can be used to carefully cut the stitches. Another option is to use a sharp knife or scissors to carefully cut the embroidery away from the fabric.
No matter what tool you use, the goal is to remove embroidery and all loose threads without damaging the fabric.
Methods for Removing Embroidery with Backing
| Tools Needed | Procedure |
|---|---|
| Manual razor | Place the fabric on a flat surface, gently slide the razor under the embroidery to cut the stitches, use a lint roller to remove threads. |
| Stitch eraser | Use the eraser to cut off unwanted stitches and stitch marks, repeat until all backing is removed. |
| Seam ripper | Insert the seam ripper under the stitching, loosen the stitches by rocking the tool back and forth, peel away the backing. |
| Electric shaker | Hold the embroidery and shaker, shake vigorously until the backing comes loose, remove it. |
| Magnifying glass | Use the side of the glass to scrape off the backing from the embroidery. |
| Lint brush or lint roller | Brush over the embroidery to loosen the backing, peel the backing away, remove any adhesive residue. |
| Duct tape or adhesive tape | Apply tape to the back of embroidery, peel it off to remove the embroidery. |
| Pair of tweezers | Cut off excess threads, gently pull up the backing with tweezers, trim stray threads from the front. |
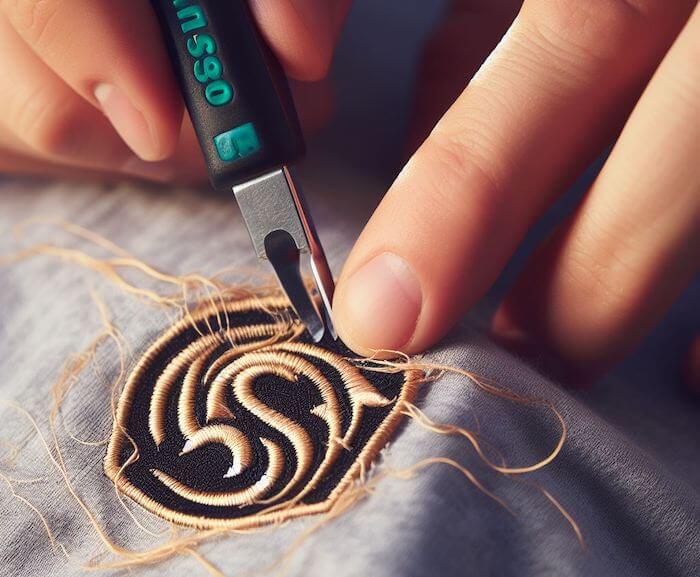
Efficient removal with manual razors
Manual razors work similar to a stitch eraser or an electrical shaver, but faster. Plastic razors are much more economical and can easily be found in any store.
Remove embroidery by placing the material on a flat surface and keeping it stable. Now put the razor gently under the back of the embroidery.
Once all the stitching is gone, turn the fabric over to remove a thread on the outside. Use a lint comb to wipe down all leftover threads.
Watch this video: Removing Embroidery With A Budget Razor [03 mins 47 secs]
Stitch removal with stitch erasers
Stitch erasers are battery or electrical stitch removers that resemble an electric razor or trimmer. This is done similarly by cutting off the embroidery with a small tooth.
How do I unstitch a sleeve on embroidery with a stitch eraser? Use a flat surface when removing embroidery stitches using stitching erasers. If not, the chemicals may cause serious health problems.
You can see the stitch eraser on your backing in just a couple of seconds. Depending on what density of the fabric is, the stitch eraser will probably be needed several times until all unwanted stitches and stitch marks are removed.
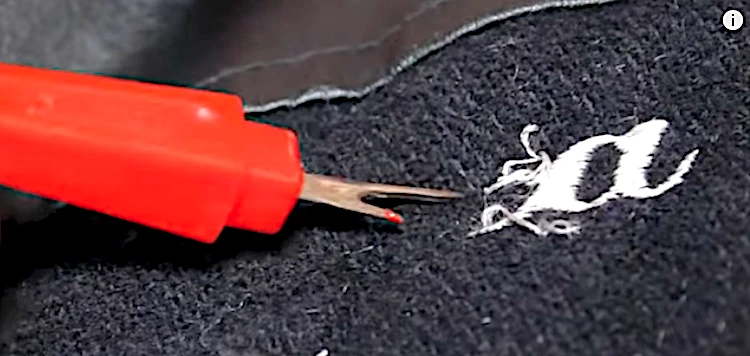
Embroidery removal with a seam ripper
If you’re looking to remove embroidery with backing, a seam ripper is the best tool for the job.
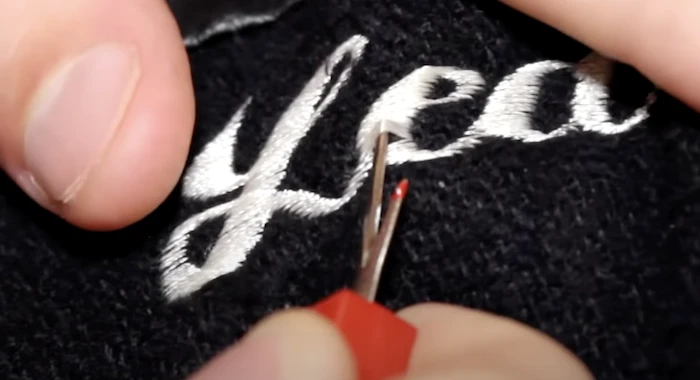
A seam ripper is a tool used for embroidery removal with a pointed, sharp end, like a needle. In removing the embroidered backing the first thing to do is to remove it from the outside with this specialized tool.
Simply insert the point of the seam ripper under the stitching, and gently rock the tool back and forth to loosen the stitches. Once the stitches are loosened, you can carefully peel away the backing. Continue around the perimeter of the embroidery until it’s completely removed.
Using electric shakers
If you have a piece of clothing with embroidery on it that you want to remove, there are a few different ways you can go about it. One option is to use an electric shaker.
This is a device that essentially vibrates the embroidery off of the fabric. It’s a relatively quick and easy process, and it doesn’t require any special skills or knowledge.
First, you’ll need to find an electric shaker. These can be found at most craft stores. Once you have your shaker, you’ll need to remove the backing from the embroidery.
To do this, you’ll need to hold the embroidery in one hand and the shaker in the other. Shake the shaker vigorously until the backing comes loose. Once the backing is loose, you can remove it from the embroidery.
Once all stitching has been removed, the cloth is turned and removed using your fingers. Use lint rollers or duct tape to wipe the surface.
Magnifying glass technique
If you’re looking to remove embroidery with backing, using a magnifying glass is a great way to do it. This method is simple and effective, and it’s a great way to get the job done quickly. Here’s how you can do it:
Hold the magnifying glass over the embroidery. Use the side of the glass to carefully scrape the backing off of the embroidery.
Some small stitches are difficult to find on embroidery, making them difficult to remove. The entire embroidery design should be seen in the magnifying glass. Repeat this process until the entire backing is removed. Enjoy your newly embroidery-free item!
Lint brush or lint roller
If you’re like most people, you probably have a lint brush or lint roller in your home to remove lint and hair from your clothes. But did you know that you can also use these handy tools to remove embroidery with backing?
Here’s how: First, gently brush the lint brush or roller over the surface of the embroidery to loosen the backing.
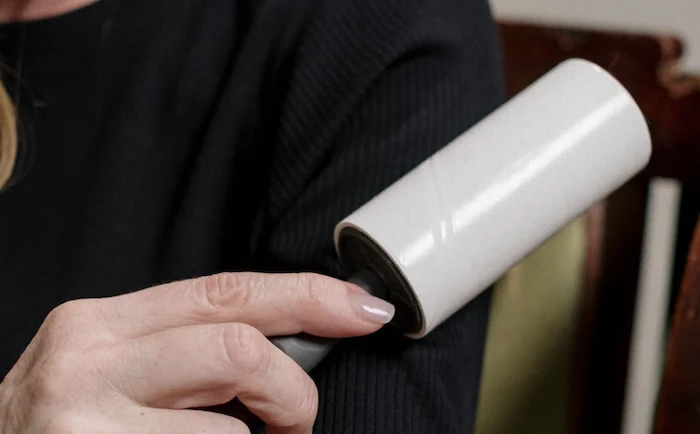
Then, slowly and carefully peel the backing away from the embroidery. If any adhesive residue is left behind, simply brush it away with the lint brush or roller to remove embroidery stitches.
With this quick and easy technique, you can easily remove embroidery with backing without damaging the fabric or using a seam ripper and stitch eraser.
Duct tape or adhesive tape
If you’re looking to remove embroidery with backing, using duct tape or adhesive tape is a quick and easy way to do it.
Simply apply the tape to the back of the embroidery, and then peel it off. You may need to use a little bit of force to get the tape started, but once it’s started, the embroidery should come off easily.
If there are any stubborn pieces of embroidery left behind, you can use tweezers or a needle to gently remove all the stitches and fuzzy threads.
Tweezers
If you’re looking to remove embroidery with backing, the best tool to use is a pair of tweezers.
Here’s a step-by-step guide on how to do it:
Step 1: Cut off any excess thread from the back of the embroidery. Gently pull up on the backing with the tweezers, being careful not to damage the fabric.
Step 2: Once the backing is removed, you can trim any stray threads from the front of the embroidery. With a little patience and care, you can easily remove embroidery with backing using tweezers.
How Can I Remove Embroidery With Embroidery Scissors?
If you’re looking to remove embroidery from a garment, the best tool for the job is a pair of embroidery scissors. Embroidery scissors have a sharp, fine point that can easily snip through embroidery thread without damaging the fabric underneath.
To remove embroidery, start by cutting along the outer edge of the design to loosen it from the fabric. Then, carefully snip away the individual stitches until the design is removed.
These scissors are designed specifically for cutting through embroidery thread and can make quick work of removing unwanted stitches. Be sure to use sharp scissors and cut along the outside edge of the embroidery to avoid damaging the fabric beneath.
If you’re having trouble removing the embroidery without damaging the fabric, try using a seam ripper to gently lift the stitches out.
Conclusion
While embroidery is a beautiful craft, there are times when you may want to remove it from fabric. Perhaps you made a mistake or the design is no longer to your liking. Whatever the reason, removing embroidery with backing is not difficult to do.
Start by cutting away the excess thread from around the edge of the design. Then, use a seam ripper to carefully remove the stitches. The backing will come off with the stitches.
Once the stitches are removed, the backing should come off easily. If it doesn’t, you can use a piece of tape to help remove it.
With a little time and patience, you can easily remove embroidery with backing, and also remove machine embroidery stitches.
Comprehensive Solutions to Frequent Queries
Q1. Can you remove something that has been embroidered?
You can remove something that has been embroidered, but it may be difficult to do so without damaging the fabric.
If you are careful, you can use a seam ripper to carefully remove the stitches. Once the stitches are removed, you can gently pull the embroidery away from the fabric.
Q2. Will removing embroidery leave holes?
If you’re wondering whether removing embroidery will leave holes, the answer is usually no. With modern fabrics and methods, the stitches used to create embroidery are usually not as dense as those used in sewing fabrics together.
However, it’s always a good idea to test on a scrap piece of fabric before removing any stitches.
Q3. How do you remove the paper backing behind embroidery?
There are a few different methods you can use, depending on what you have on hand. For example, if you have a lint roller, you can simply roll it over the back of the embroidery to remove the paper.
If you don’t have a lint roller, you can use a piece of tape to remove the paper.