If you are one of the craft lovers, and you like experimenting in a cozy corner of your home, you will probably like this guide about how to make heat transfer paper that you can easily use to ornament your favorite T-shirt, a tote bag, or whatever you want.
I have to admit that I tried almost all the methods which will be explained in this guide, but I will also try to give you some more advice on how to make heat transfer papers.
In the next sections, you can read more about several methods of making your own heat transfers, detailed instructions, and some basic steps before printing your favorite design.
Let’s start!
Common Methods of Making HTP at Home
Method 1: Sublimation transfer method
I would like to start with a little bit more complicated method than the other ones which will be explained in the sections below.
On the other hand, the sublimation transfer method is great because it gives the best results.
The result that you can achieve with other methods is that you add the layer on the top of the fabrics.
With the sublimation transfer process, the final result is that the ink becomes a part of the fabric you want to print on, which means that your design will last longer.
For this transfer process, your sublimation inkjet printer has to be set up with sublimation ink.
You have to know that this type of printing transfer cannot be used on a regular printer, you either convert a regular printer to work with sublimation ink, or purchase a printer designed specifically for the sublimation process.
However, the bigger problem than the previous one is that it would be great to use is a heat press because the optimal pressure for this type of sublimation transfer paper is 400 degrees.
Items you need for sublimation transfers are:
- Sublimation tape or spray adhesive for sublimation
- A printed mirror image
- Scissors for cutting the image
- A heat press machine set up at 200 seconds
Method 2: Rhinestone heat transfers
This type of heat transfer can be especially interesting for girlish shirt designs because it makes your ordinary item into a sparkling one.
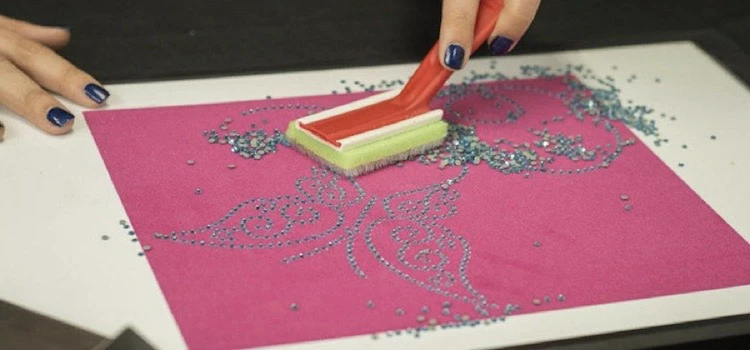
The transfer process is pretty much simple if you provide all these items:
- A desirable template
- Rhinestones in a desirable color
- Transfer tape
- An iron or a heat press
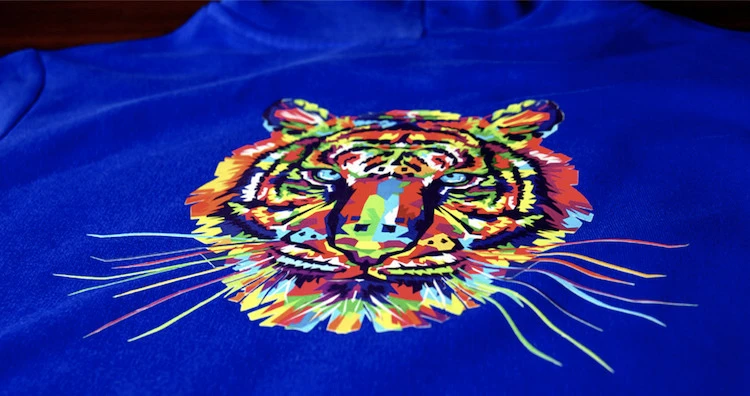
Method 3: Siser easy subli transfer
This is one of the unique ways, and one of the best ways to transfer images on dark fabrics.
It is a heat transfer vinyl that can be printed on fabrics with EasySubli Inks.
Items needed are:
- A sublimation printer
- Transfer sheets
- A heat press
- Transfer masks
Method 4: Screen printing
One of my favorite heat transfers methods because ink colors directly the fabrics.
I prefer when inks color materials instead of being on top of it. However, it is a more delicate process than many others.
Items you will need:
- Freezer paper
- A cutting machine
- Screen printing ink
- An iron, a heat press, or a cutting press
This printing process requires a freezer paper as a transfer paper on which you should print your design.
The design has to be cut out with the cutting machine.
Place the transfer paper on the t shirt, and then use a heat press or an iron to transfer the design on the fabric.
Screen printing is great for making heat transfers for commercial uses.
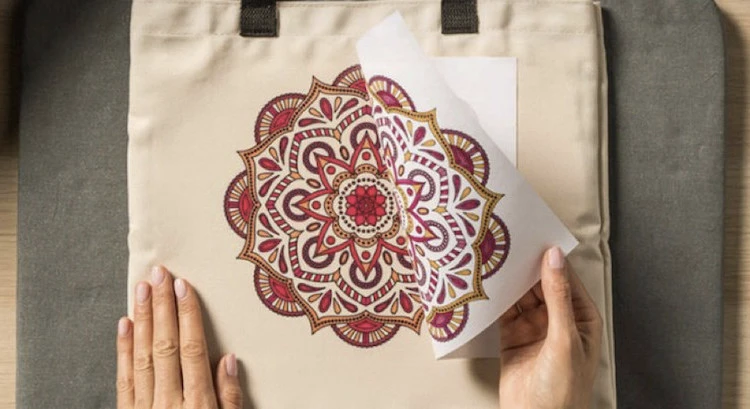
Method 5: Inkjet transfer paper
InkJet transfer paper method is also called Avery transfer paper.
The items you will need are:
- Avery transfer paper
- Ordinary inkjet printer
- A cutting machine
- An iron or a heat press
Print your favorite design on inkjet paper. Use the cutting machine to cut out all the pieces of the inkjet paper around the image that you don’t need.
When you finish with the cut pieces, pull away from the backing paper, and position the transfer paper on the garment.
This is a very easy way to transfer images on T-shirts, so you can use an iron to do the pressing.
Heat presses the design on the T-shirt in no time, and it is ready to wear immediately.
Method 6: Cricut infusible ink
I have to underline that this method doesn’t support home iron heat press transfers.
It is necessary to use a heat press machine.
However, this type of heat transfer is the easiest because you don’t need any inkjet printers to do that.
Many available transfer sheets come in one color, different colors, and many interesting designs.
All you have to do is to cut out your sheet design and apply it to the T-shirt.
Then, use a heat press to create a unique printed design on your T-shirt.
Method 7: HTV transfer
This method is one of the heat press transfers which is the most used.
It is called the heat press vinyl transfer.
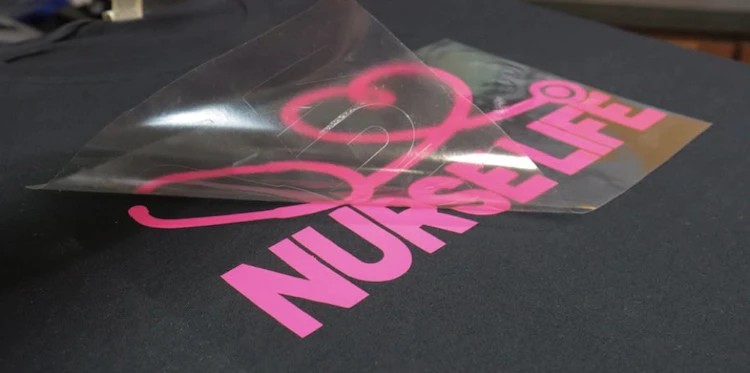
It is necessary to cut a design into the HTV with one of the cutting machines that you have got at home.
Then, the design is pressed on the garment using a heat press or an iron.
It is possible to turn your old T-shirts into brand new ones in no time.
How to Choose Transfer Paper
Choosing the right transfer papers is one of the basic and crucial steps during the heat press transfer.
For light-colored fabrics like white, yellow, or light grey transfer paper has to be transparent.
On light fabrics and this kind of paper, you should always use dark colors, and don’t forget to trim the edges of your design before you print it.
And remember, light colors and materials are delicate.
For dark-colored materials like black, blue, or grey, a paper has to be thicker.
It is important to note that you have to be careful when you cut design around.
Basic Steps for Creating Your Heat Transfers
Buy transfers
Many DIY crafters like buying the whole transfer kit which comes inside with everything you will need for custom transfers.
It means that in one kit you can get image software, papers, and even a piece of fabric for creating an HTP at home.
Search & create a picture
If you are one of those who like having a unique image on T-shirts, you have to create one first.
You can download a picture from the Internet, you can create an image using one of the many free software programs or you can just scan an image you like on your computer.
Here is a quick starters list of free tools you can use for design creations to get you started:
- GIMP (download here)
- Inkscape (download here)
- Krita (download here)
- Canva (Browser based: get here)
Edit or mirror the picture
Editing an image is very easy if you use editing software.
You can change the size and colors or add some more details to it.
Mirror the image isn’t always a necessary step.
If you want to transfer the image that has letters, words, or numbers on it, you have to mirror the image.
Don’t forget to save the changes, so you don’t have to do it all over again!
Print transfers
This is the last step before you apply the image to the fabrics.
Using your ordinary printer, make an example of the image you want to print on fabric.
You can do it on a regular paper to check out the whole procedure.
If you are happy with your tested image, it is time to print it for real.
There is a small difference when it comes to your printer.
You can’t use ordinary papers for laser printers.
They have special transfer papers that you must use to get the best results, and not destroy your T-shirt.
I would also recommend a laser printer over an inkjet one because colors are better, and if you don’t use laser printers too often, colors won’t dry up.
So, if you have a laser printer, pay attention to the papers you are going to choose.
Pressing transfers
Apply the image, and start heat pressing.
The press item you are going to use depends on the method.
Sometimes, it is possible to use an iron, but it is always better to use a heat press machine because the pressing strength has to be medium, and iron can never be hot enough.
Hold heat press with the medium pressure at least for 20 seconds.
Remove the transfer paper, and check out the result.
Detailed Information on Often Raised Concerns
Q1. What is the best type of fabric to use with transfer paper?
The best type of fabric to use with transfer paper is the one that contains 100% natural fibers like cotton, silk, and linen.
Q2. What is the difference between white and transparent transfer papers?
The first one is for dark-colored fabrics, and the second one is for light colors.
Q3. What is the best heat press transfer?
If you don’t possess a heat press transfer, an iron will be useful, too.
However, it is always better to use a heat press machine because it constantly provides heat and pressure at the same time, which ultimately produces the best results!
Conclusion
I sincerely hope that this guide helped you a lot with your DIY heat transfer crafts and that it will make the whole process easier than it already is.
I also recommend reading the section below, and maybe find out more about heat transfers at home.