Celebrating National Coffee Day? It’s a testament to the love that people have for that perfect cup of joe. Yet, did you know that there’s an International Tea Day as well? It’s a reminder that mugs play a significant role in our daily routines, and honestly, can we ever have too many of them?
Regardless of whether you’re a devoted coffee connoisseur, a tea enthusiast, or someone who adores a comforting mug of hot cocoa, there’s no denying that the right mug can elevate your beverage experience. Even if you’re simply an ardent collector of unique mugs, each new addition to your ‘mug life’ collection is a cause for celebration, bringing a warm smile to your face.
In this article, we’re about to embark on an exciting journey into the world of mug decoration. Get ready to explore creative and fun ways to transform plain, ordinary mugs into delightful, personalized works of art.
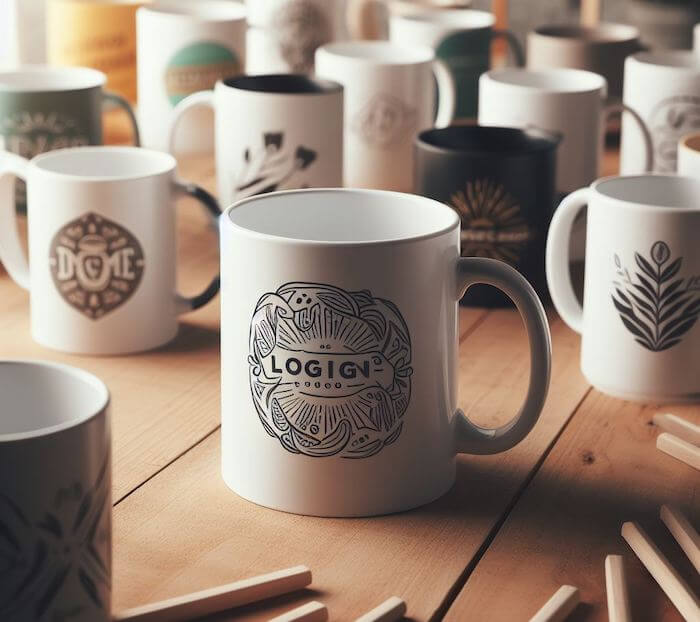
We’ve got something special in store for you! Grab your favorite beverage, find a cozy spot, and let’s dive into the art of mug decoration and application!
Key Takeaways
Consider safety first
Is your mug for decorative purposes, or for drinking from? Follow the examples that are dishwasher and microwave safe if you intend consuming from it.
Preparing your DIY mug
Preparation before the decoration process is important. This means removing oils from fingertips and other types of dirt. Do this using dish soap with warm water or rubbing alcohol with a cotton ball. Let the mug dry before decorating.
Decorate on glassware or ceramic?
Both these mediums are ideal for decorating on. Glass is great for applying glitter and etching. Whereas ceramic is ideal for paint, inks and “solid” colors.
Preparing Your Mug Ready For DIY Work
Before considering the printing process, always consider the preparation process to ensure successful production.
In this case, the medium of choice will be given the best chance of adhesion onto the object (glass or ceramic mug).
To do this remove dust, debris or oils from fingers. We do this in two ways:
- Wash the mug with mild soap and rinse off throughly with water.
- Wipe all mug surfaces with rubbing alcohol and a cotton ball.
Allow the mug to dry completely before the decorating process.
But before we start, here are some fun facts:
| Rank | Decoration Method | % of Mug Decorations |
|---|---|---|
| 1 | Sublimation Printing | 50% |
| 2 | Screen Printing | 25% |
| 3 | Heat Transfer Printing | 15% |
| 4 | Pad Printing | 5% |
| 5 | Laser Engraving | 3% |
Now that your ceramic mugs are ready to be worked, here are 8 personalized mug decorations using a variety of printing methods to incorporate:
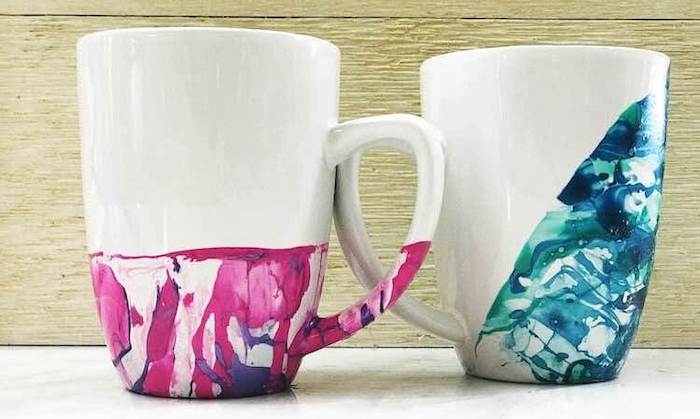
#1. Mesmerizing Nail Polish Marble Impact
This first method might be a bit messy. But in all that mess, you’ll get a unique and unrepeatable pattern. No two mugs will ever be identical.
You will want to fill a bowl with room temperature water. Hot water will thin the nail polish and make the design bleed. Be sure the bowl is deep enough that you can dunk the mug in it.
Note: If you want to reuse the bowl, you can cover it with a plastic bag. If not, when emptying the contents, nail polish will get stuck to it and spoil.
Next, add nail polish in the colors you want into the water. Using different colors is recommended in order to get a marble effect.
Tip: Glittered nail polish can be used to add a touch of flare onto the mug’s design.
Then use a toothpick (or a q-tip) to scrape the surface of the nail polish to make your desired pattern. Be gentle with this process, you do not want to force the nail polish below the surface of the water. You want it to float!
Dip your mug gently into the water and keep it in place for 3 to 4 seconds before lifting it out. You can angle your mug any way depending on how you want to design to go on.
Ideally you don’t want the nail polish to get to the rim of the mug for two reasons:
- You will be drinking from that area of the mug.
- The contents will likely enter the mug and you will have to clean it out.
Let the mug dry on its own. Then bush on Mod Podge to seal in the colors and make it dishwasher safe. The last thing you want is for the nail polish to melt with the heat from the dishwasher.
Your new mug is all set and ready for a delicious drink!
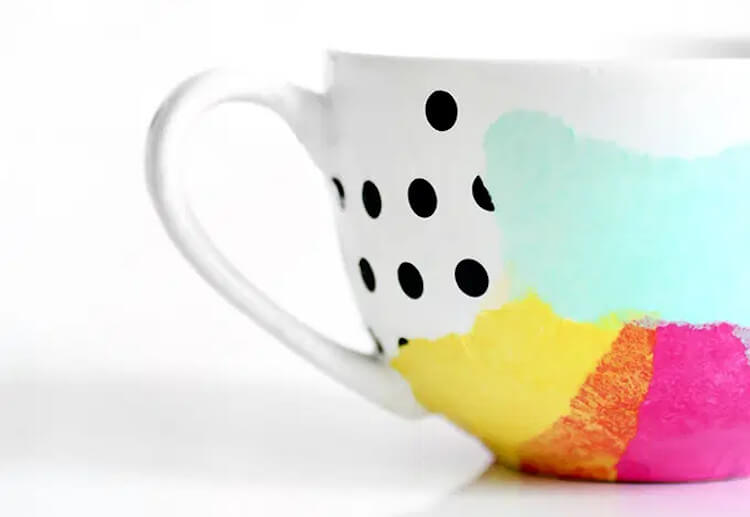
#2. Create Stunning Paint Drip Effects
You might remember the old popular DIY project with crayons and a hair drier? You would take the crayons and stick them to a canvas. After that a hair drier is used to melt them and the drip would make for fantastic artwork.
Here is something similar for mug lovers: Use tape to cover the part of the mug where your mouth will go (circumference of the lip). You don’t want to get the taste of paint with every sip!
Once covered, find a place you don’t mind making a mess on. Or just add a piece of paper that you can dispose of later on.
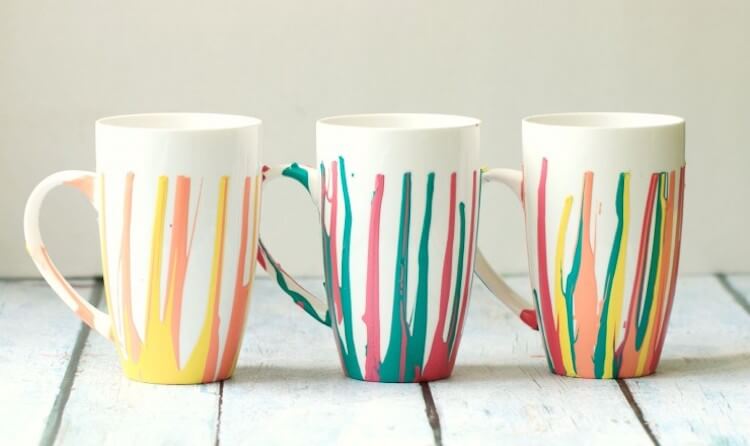
Prepare acrylic paint in your favorite colors. Turn the mug upside down and pour the colors on the bottom (now top) of the mug. Be patient! Let the paint drip over the edges and run down with the help of gravity.
Thin layers of acrylic paint dries within 30 minutes. But I like to give it 24 hours to be on the safe side. This is especially true if I add two layers of paint. You have to be sure to wait until the first layer is dry before adding the second.
Once dried, remove the tape and cover the mug in Mod Podge. It will give the mug extra durability and make it dishwasher safe.
And here’s a new quality decorated addition to your collection!
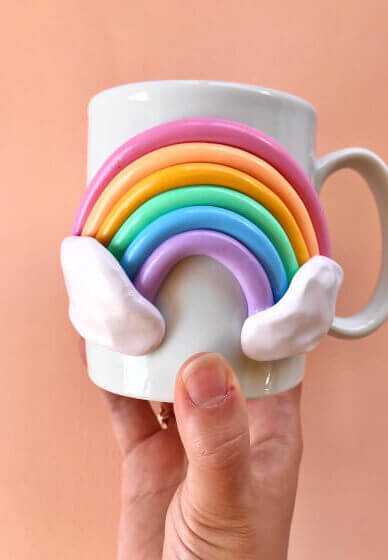
#3. Unique 3D Clay Decorations
Another fun way to decorate a mug would be using polymer clay.
Pick out a motif and the colors you want to use. Make a shape and gently press your creation onto the mug.
Then, read the baking instructions on the clay package. Bake it according to the instructions.
Most likely, you will have to put the mug in a cold oven and bake it until the heat hardens the clay.
Wait until the mug has cooled, and then you can cover it with a layer of Mod Podge for extra sturdiness. It will also be microwave safe. So you don’t have to worry that the clay will just drop off.
If there was a perfect gift for Mother’s day or Father’s day, it’s this DIY mug!
#4. Dazzling Glitter Mug Creations
Another great gift idea that is also cute is this glitter mug!
All you will need is a plain mug from dollar tree store (or any dollar store), some glitter and glue or spray adhesive from a local craft store.
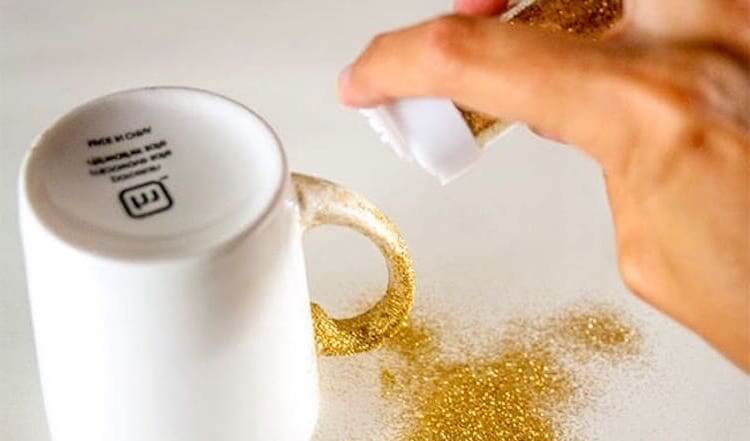
Once again, find a place you don’t mind making messy or use something that you can clean with quickly. Now get ready to be crafty.
Cover the surface of the mug you want to decorate in glue or spray and sprinkle glitter over it. Let it sit for a while.
Repeat the process until you get the desired glitter coat. Ideally, let it sit overnight and cover with Mod Podge.
You can also use regular sharpie markers to add some extra drawings to the mug and make it super special. We show you how to do this on the next step shown below!
This coffee mug is an easy diy project and it makes a great gift!
#5. Hand-Drawn Sharpie Mugs
Another simple idea for you – a DIY sharpie mug!
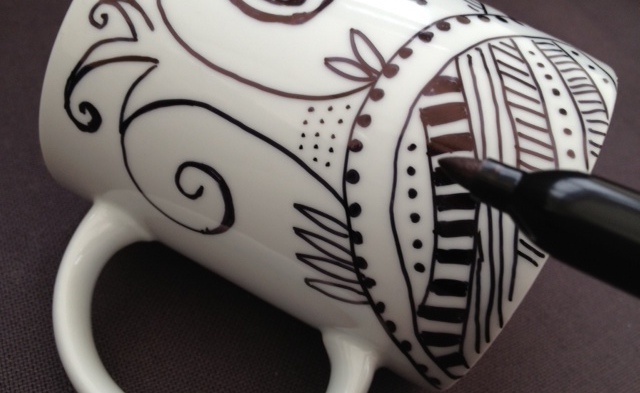
There are literally hundreds and thousands of creative designs you can make using sharpies.
What you will need are regular sharpies, oil based paint pens, a plain white mug, time and creativity!
Did you know? It’s important to use oil-based markers, as they will be more resistant to fading and washing.
Simply pick out your favorite colors, and draw on cups and mugs as your print method!
This is a fun idea for a DIY project with your kids, and these DIY sharpie mugs will make a wonderful gift!
AND, they are food safe, so you don’t have to think if the mugs will be used for drinking or only as ornaments.
#6. Playful & Adorable Vinyl Mugs
If you have some extra permanent adhesive vinyl laying around, here is a project for you!
You might haven’t thought of this, but you can easily decorate your mugs with vinyl too!
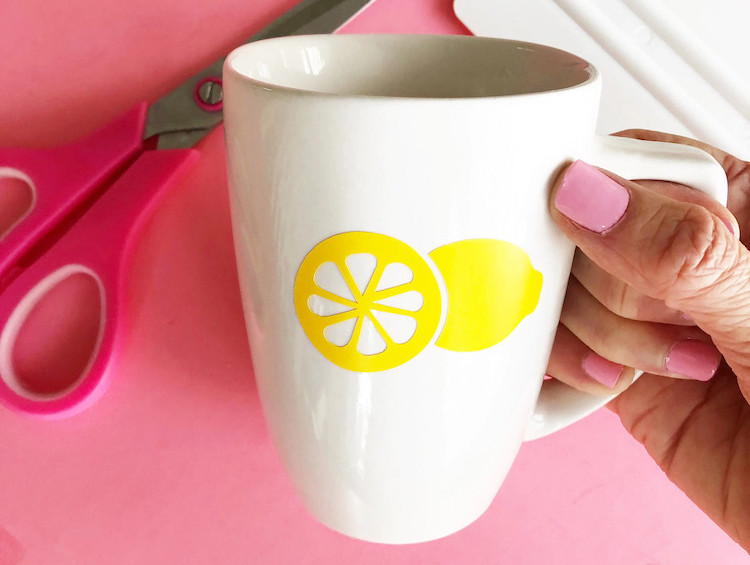
What you will want to do for this project is make some fun stickers and add them to your cute cups and mugs.
Vinyl stickers can be made in all shapes and sizes, and you can also combine them with other techniques, like oil based sharpies or nail polish to make new creative designs.
Fun Fact: Vinyl is a great option for decorating mugs, as it is easy to apply and remove!
The more ideas you combine, the better and cuter mugs you will make! But don’t go overboard, add too much combination and things can start to look messy!
#7. Tissue Paper Mug Method
This is yet another fun idea that can get you a lot of amazing designs, and it’s pretty simple and straightforward!
All you want to do is cut some paper, or even make some stickers out of it, stick it to the mug to decorate it, cover it with Mod Podge, add more paper (stickers), and keep repeating until your design is ready.
Once done, cover with another layer of Mod Podge which will make your mug dishwasher safe (and hand wash safe!), and let it sit for a few hours, or ideally overnight.
And in the morning, your new mug will be ready for some delicious coffee!
#8. Spray Paint Mugs
Another fun idea for diy coffee mugs is decorating them with spray paint.
This might not be as colorful to decorate your coffee mug with diy sharpie or glitter or dripping paint, but you can produce some elegant and minimalist pieces that everyone will love.
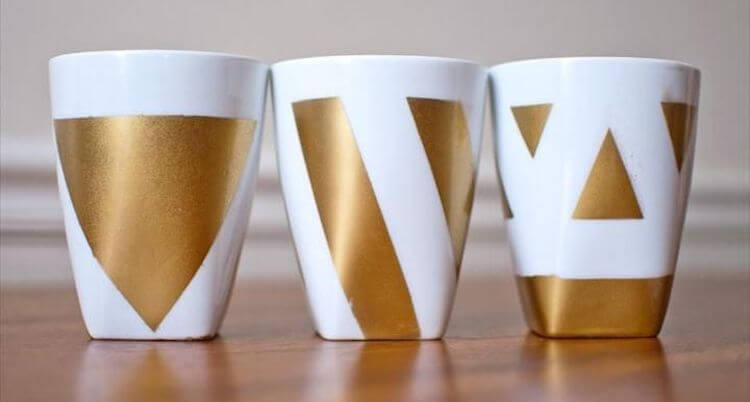
Cover your plain white mugs (or any color mug for that matter) in tape. Creating different shapes and designs, and then use the spray paint to apply some color to your mugs.
You can also use several colors and layers to make more intricate designs, but overall, this is a straightforward and simple method to make unique diy mugs.
Spray paint usually takes about 5 minutes to dry to the touch. However, it is best to leave it up to 1 hour to dry fully. If you want to add a second layer to have a longer lasting design, then wait until the first layer dries before applying.
#9. Other Ways to Decorate Your Mug
Already inspired by the first eight fantastic ways to decorate mugs? Well, hold onto your creativity because there’s more to come! In addition to these exciting methods, we have a bonus video that unveils even more innovative ways to adorn your mugs.
Your journey into the world of mug decoration is about to get even more thrilling, so let’s keep the artistic momentum going!
Watch this video: 21 More Mug Decor Projects [12 mins 25 secs]
Final Word
There are countless ways on how to decorate mugs and make beautiful designs that everyone will love.
No matter if you’re looking for a project to do alone or with kids. No matter if you want to make something for yourself or someone else. A handmade one is always the most personal and warm gift one can give or receive.
We can’t wait to see your creations!
Answers to Popular Queries with Explanations
Q1. Can regular Sharpies be used on mugs?
The answer is YES! Any Sharpie paint color can also be used, but take into consideration that depending on the color used, sometimes they will get darker after baking.
Oil-based markers, as they will be more resistant to fading and washing.
Q2. What’s the easiest method of decorating a mug?
Vinyl is a great option for decorating mugs, as it is easy to apply and remove!
Q3. What is the most popular mug decoration on the market?
The most popular mug decoration is sublimation printing, which accounts for over 50% of all mug decorations.