The chances are you’re reading this because you’re interested in personalising your tumbler. One of the quickest way of doing so is by applying it with heat transfer vinyl, but how effective is it and do you get everlasting results?
Quick Answer to the Query
The answer is a resounding ‘yes,’! To add heat transfer vinyl to a tumbler, measure and cut the vinyl, apply heat to make it stick, work your way around the tumbler, and finally trim any excess before lining up the seams. Optionally apply epoxy for durability, and get creative with decorations while considering hand-washing for longevity.
Nowadays, you can have personalized content and ads on your items. You can decorate your tumblers for yourself or make great gifts for your loved ones. Either way, it’s a handmade item that brings meaning!
Let’s see how you can heat the transfer vinyl and, most importantly, how to decorate your tumbler to last a long time.
→ Personalized tumblers decorated with HTV sell at a 35% higher price compared to plain ones.
→ Smooth-surfaced tumblers yield a 98% satisfaction rate when using HTV.
→ Using a heat press machine specifically designed for tumblers and rounded containers increases the adherence of HTV on tumblers by 20%.
Understanding Tumbler Materials & Their Compatibility With HTV
When it comes to decorating tumblers with heat transfer vinyl (HTV), understanding the material types of the tumblers is crucial. The composition of the tumbler can impact the success and longevity of the HTV application. Here’s a breakdown of common tumbler materials and their implications for HTV decoration:
Stainless Steel Tumblers
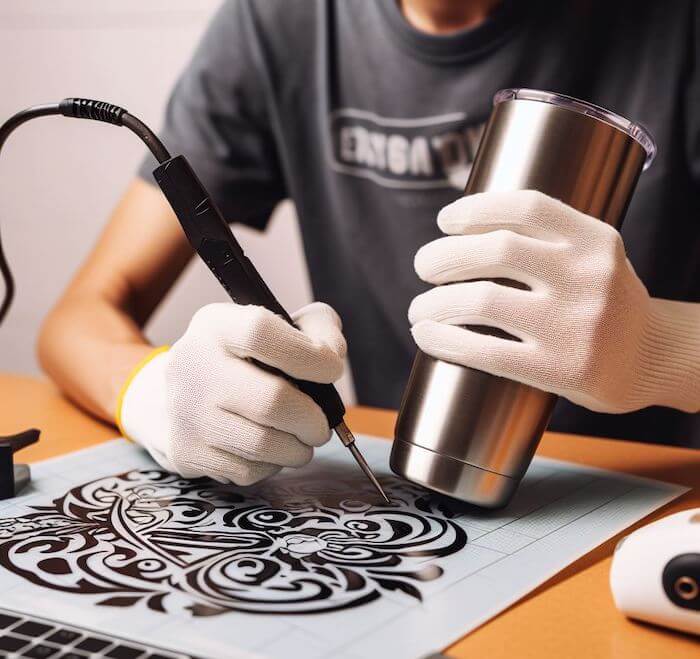
Stainless steel tumblers are popular due to their durability and ability to maintain temperature. When applying HTV to stainless steel, ensure the surface is clean and free of any oils or residues that will interfere with the HTV adhesive. Stainless steel’s smooth surface provides an excellent canvas for HTV application, resulting in vibrant and long-lasting designs.
Plastic Tumblers
Plastic tumblers come in various forms, including acrylic and BPA-free plastics. Unlike stainless steel, plastic surfaces may not provide as smooth of a base for HTV application. Consider selecting plastic tumblers that are heat-resistant to mitigate the risk of expansion or contraction, which can affect the adhesive properties of HTV. Additionally, consider using a lower heat setting and test a small area before applying HTV to plastic tumblers to prevent melting or warping.
Glass Tumblers
Glass tumblers offer a sleek and transparent canvas for HTV designs. However, the smoothness of glass can vary, impacting the adhesion of HTV. It’s crucial to thoroughly clean the glass surface (preferably with alcohol) and use a high-quality HTV material for optimal results. Additionally, exercise caution when applying heat to glass tumblers to prevent cracking or breakage.
Preparing the Tumbler Surface for HTV Application
Before applying heat transfer vinyl, it’s important to prepare the surface properly to ensure good adhesion and longevity of the design. Follow these steps to effectively prepare the tumbler surface:
- Clean the Surface: Begin by thoroughly cleaning the surface of the tumbler with soap and water to remove any dirt, dust, oils, or residues. Use a lint-free cloth to dry the tumbler completely.
- Use Rubbing Alcohol: To further clean and degrease the surface, wipe it down with rubbing alcohol or isopropyl alcohol. This helps remove any remaining contaminants that might have been left over from step 1 above.
- Avoid Touching the Surface: Once cleaned, avoid touching the surface of the tumbler with bare hands to prevent transferring fingerprint oils or residues that could affect the adhesion of the HTV.
- Ensure a Smooth Surface: Depending on the material of the tumbler, you may need to sand or roughen the surface slightly to promote better adhesion. Generally speaking this step is not usually required.
- Preheat the Tumbler: If using a heat press for HTV application, preheat the tumbler for a few seconds to remove any moisture and warm up the surface, which can enhance the adhesive properties of the HTV.
- Use a Tack Cloth: Before applying the HTV, use a tack cloth to remove any remaining dust or debris from the surface of the tumbler. This ensures a clean and smooth surface for optimal adhesion.
Applying HTV on Tumblers: Step by Step Guide
The process of heating the transfer vinyl on tumblers requires some patience, but it’s easy to do that you’ll want to do it again. It will take just a few minutes to make your cup one-of-a-kind.
Here’s the list of things you’ll need with instructions:
- A tumbler.
- Heat transfer vinyl.
- Transfer paper.
- Scissors (or scalpel).
- Sandpaper.
- Epoxy.
- Gloves.
- Heat source.
- Alcohol.
Take a tumbler and measure its borders on the transfer vinyl. It’s recommended to leave an inch more to stick out. The idea is to have an extra inch of material in case a mistake is made. You can also use a ruler and a pencil to mark the vinyl’s starting edge to ensure it’s perfectly straight.
If you’re doing this on a stainless steel tumbler, use heat on a small area where the borders of your vinyl will start just to warm it up. This way, your vinyl will automatically stick to the stainless steel when you bring the vinyl close to the tumbler.
Continue to heat the top of the vinyl and gently press it with your fingers. If you’re not using heat-resistant gloves, use a paper towel to avoid the burns on your fingertips.
Unlike adhesive vinyl, heating the transfer vinyl requires constant pressure to ensure it is correctly put on the tumbler. So be patient and mix the heating and press with your fingers.
Repeat the heating and pressing all around the tumbler until it’s all wrapped in vinyl. Cut off the overhang vinyl with scissors in a straight line. The more patterns the vinyl has, the less visible the vinyl edges or possible mistakes will be. Heat and press again if necessary.
Cut off the excess at the top and bottom of the tumbler (a vinyl cutter can come in handy here). Use the heat again to align the vinyl edges. You can remove the excess on the edges with a small knife or a scalpel.
You can additionally apply epoxy for the scratch-resistant glow and more durable design. If you do, leave it spinning overnight and remove the excess at the top and bottom edges again the next day. Gently go over the edges with sandpaper avoiding hard pressure because it can damage the vinyl.
Finish the process by rubbing alcohol to make it smooth and clean for extra decorating.
Adding extra decorating to the vinyl decal
When the main job is done, you can continue with the fun part that most crafters love… adding extra decoration.
Adding glitter and stars is the most popular way to make a different, personalized vinyl design.
Now is the time to be as creative as you want. But you must take care to the quantity of glitter you put on your project. Don’t exaggerate with the layers. Tap the glitter in small amounts to avoid overflowing and dripping down the sides.
Allow the vinyl to cure and put some chalk paint with a paintbrush for extra details.
You can also use heat transfer foils. Putting them onto the tumbler is the same as with heat transfer vinyl.
As a finishing touch, add a layer of epoxy sealant one more time. Spread it gently over the surface area of the tumbler.
Let it spin and dry overnight.
Watch this video: HTV on Stainless Steel Tumbler [18 mins 09 secs]
Heat Press vs. Iron: Best Method for Applying HTV on Tumblers
Choosing between a heat press and an iron is a common dilemma for crafters embarking on heat transfer vinyl (HTV) projects. Each method presents its unique advantages and considerations, impacting the quality and longevity of the finished design.
However, when it comes to applying HTV on tumblers, the specialized design of a heat press tailored for such projects—such as the one showcased in the sidebar—undoubtedly surpasses the capabilities of a household iron. The unique shape and surface of tumblers require precise heat and pressure distribution, factors that a dedicated tumbler heat press can effortlessly provide, ensuring professional-grade results every time.
Let’s now look at other differences between the two methods to help crafters make an informed decision based on their specific needs and preferences:
Heat Press: Precision & Professionalism
One of the primary advantages of a heat press is its precise temperature control, allowing crafters to achieve consistent heat distribution across the entire surface of the tumbler. This precise control ensures uniform adhesion of the HTV, reducing the risk of wrinkles, bubbles, or uneven application.
In addition to temperature control, heat presses also offer even pressure distribution, resulting in professional-quality results. The consistent pressure applied by a heat press promotes optimal bonding between the HTV and the tumbler surface, ideal for achieving vibrant and long-lasting designs. As a result, heat presses are favored for projects requiring intricate designs or larger production runs, where consistent results are necessary.
Household Iron: Accessibility & Affordability
For hobbyists or occasional crafters, an iron may be a more accessible and budget-friendly option for applying HTV on tumblers. While not as precise or efficient as a heat press, an iron can still yield satisfactory results for smaller projects or one-off designs. One of the main advantages of using an iron is its affordability and accessibility, making it an attractive option for those who may not have access to a heat press or are working within a limited budget.
However, there are considerations to keep in mind. Unlike heat presses, irons may not distribute heat as evenly, increasing the risk of uneven adhesion or heat-related issues. Achieving consistent pressure with an iron also requires manual effort, which can be challenging, especially between the flat surface of an iron and the curved contours of a tumbler. Crafters must also be cautious to avoid overheating or scorching the HTV or tumbler surface, as irons can be less forgiving than heat presses.
Caring for Tumblers with HTV
Your HTV has been applied and you are happy with how your tumbler has turned out. At this point you should be pleased with your success, especially if this is the first time you are trying this technique. However, it’s crucial to take proper care of your custom creativity to ensure its longevity. Here are some important tips to follow:
1. Consider Hand Washing
- Hand washing is the preferred method for cleaning tumblers with applied HTV. Use mild dish soap and warm water to gently wash the tumbler.
- Avoid using abrasive sponges or scrub brushes, as they may damage the vinyl.
2. Avoid Soaking
- Do not soak the tumbler in water for an extended period, as this can weaken the adhesive bond of the HTV.
- Instead, wash the tumbler promptly after each use and dry it thoroughly.
3. Avoid Dishwasher Use
- Avoid dishwashers, as the high heat and abrasive detergents can damage the vinyl.
- The heat from the dishwasher can cause the HTV to peel or warp, compromising the integrity of the design.
4. Avoid Microwaving
- Do not microwave, as the heat can damage both the vinyl and the tumbler itself.
Troubleshooting Common Issues with HTV on Tumblers
Add text
Conclusion
You can heat transfer vinyl on ceramic mugs, metal tumblers, or stainless steel tumblers. Using different methods, you can get similar results.
The process of heating is almost the same. It’s up to you how you’ll make your tumbler personalized.
Hand-washing the vinyl is a better choice if you want your tumbler to last longer.
Expanded Responses to Frequently Requested Questions
Q1. How can you attach a patch on a backpack?
There are 3 options: You either glue your patch onto a backpack or sew it using thread and needle or a sewing machine. The choice is all yours!
Q2. What stitch is best for patches?
Depending on how you plan to attach your patch onto a backpack, you can use two types of stitches.
If you go with hand sewing your patch, you should probably use a straight stitch because it will be easier for you to sew. On the other hand, if you want to machine sew your patch, you should go ahead and make it more secure with a zig-zag stitch.
It is important to keep your stitch close to the edge of your patch, no matter the sewing option.
Q3. Where should you sew patches?
It doesn’t really matter where you should sew patches onto a backpack. You can put them on the inside of your bag; you should only be careful and don’t make your loop visible on the outside. You can easily avoid this if you hand sew a patch onto a backpack because it’s much easier to control the backpack and patch movement while working.
Q4. Should you put a patch on a new backpack?
If you don’t like your new bag because it is too plain, you can always make a couple of stitches and attach some cool patch onto it. We don’t recommend gluing anything on a new backpack because you can’t take it off later; You can always cut the stitches off without anyone noticing!
Q5. What to do if the patch is too thick?
If you have a problem hand sewing your patch because it’s too thick, you can ether glue it on a backpack or use a machine to sew it on; If there is no glue on the back of the patch, and you don’t have a machine at home, try reaching someone who possesses one, or going to the tailor to ask for help. Try not to waste your time trying to hand sew the thick patch onto a bag, because you will have trouble to push the needle through both the material and the sticker.