All 3D models are made up of polygons, they could be triangular in shape, square or have more points. These polygons are the building blocks that make up the whole model.
The more polygons the model has, the smoother it looks. So it begs the question, why would anyone want to reduce polygons to a model? Surely this would give the model a more angular and jaggy shape?
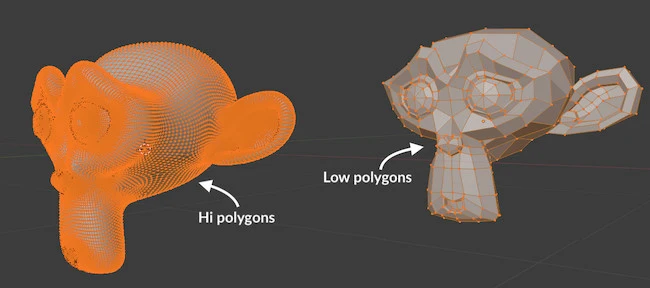
There’s a downside to high polygon models. They require a lot of computer performance, such as when rendering or even editing the model. This can be frustrating and hinder your work performance which is not good!
The idea is to have a balance, where your models is made to look as realistic as possible with the least number of polygons. And [highlight-it color-1]this is where the decimate modifier comes to the rescue[/highlight-it].
Note: An other application where having low polygon models would be in the gaming industry. The reduced polygons means less processing power and a faster gaming experience. However, the trick is to make the models look realistic and not 1990s boxy.
Quick render times are also necessary elsewhere in the 3D world. When animating and simulating models, we are taking multiple rendered frames and making them into a movie reel. Any savings is a must for efficient production.
How To Use Decimate Modifier In Blender?
I’ve always wondered what to do after creating a model that’s been subdivided to make it look smooth, only to realize I’ve over done it!
I have already “applied” the high poly mesh, and thought it was impossible to get it back, until now!
We can achieve this when we [highlight-it color-1]apply Blender’s decimate modifier (a kind of addon) by reversing the application of high polygons[/highlight-it].
So, how do you apply the decimate modifier to your model, and where is located on Blender?
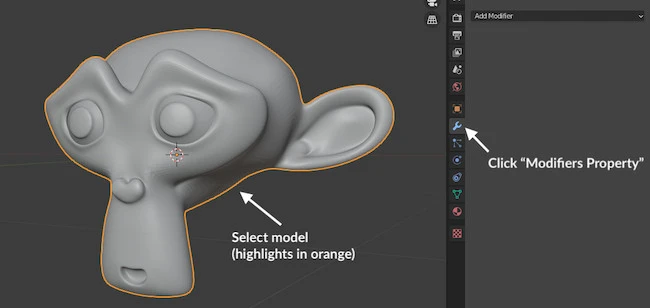
Step 1: Select Object & Click Modifier Properties Icon
Make sure you select your model first by left mouse clicking. Then click on the “modifier properties” icon.
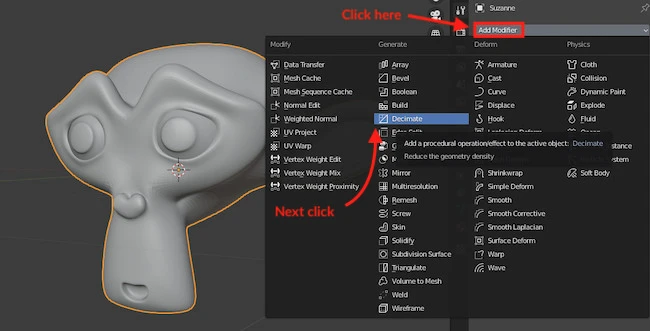
Step 2: Apply Decimate Geometry Modifier
Next click on “Add Modifier” and then “Decimate”.
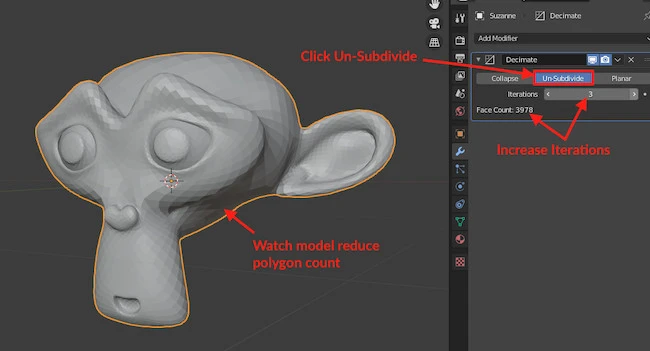
Step 3: Un-Subdivide Polygons
Click the “Un-Subdivide” tab and increase the “Iterations”
You will see the model losing it’s smoothness!
You are done!
Is There A Decimate Shortcut On Blender?
Although not technically a shortcut, there is an other way of decimating your model on Blender. This method allows you to be in edit mode, where you can see the polygons, and watch them reduce as you decimate.
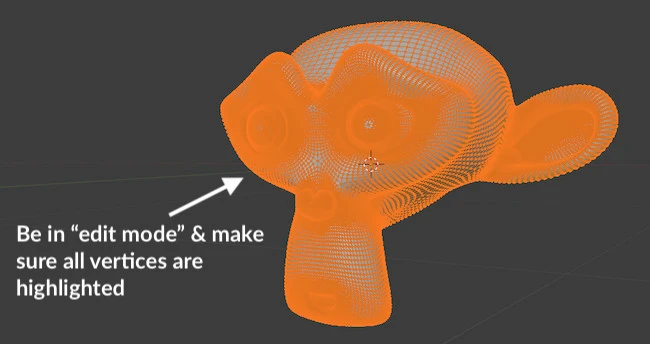
Step 1: Be In “Edit Mode”
Make sure your model is in “edit mode” and the mesh is completely highlighted.
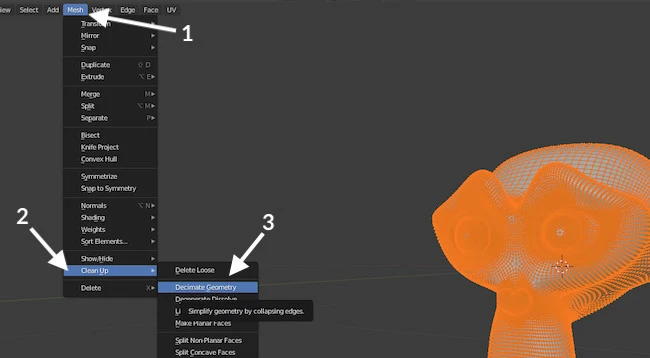
Step 2: Decimate Geometry
Next go to Mesh > Clear Up > Decimate Geometry
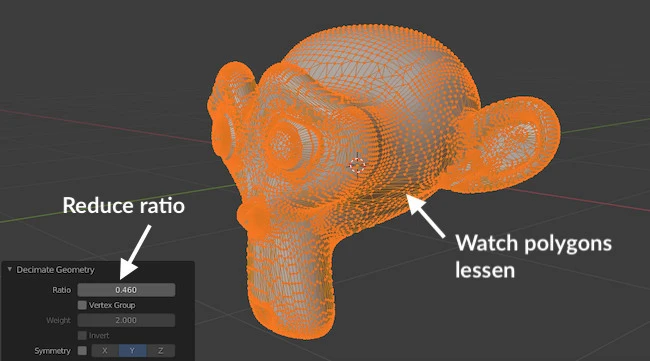
Step 3: Reduce Polygons
Lower ratio and watch mesh polygons reduce.
You are done!
Closing Thoughts On Decimating
Having the flexibility of being able to go from high-polygon to low-polygon without compromising your mesh is crucial. I did not know this was possible until recently.
And the beauty is, if you don’t like how far you’ve gone with reducing the face-count, you can simply click the “X” button, and everything reverts back.
This demonstrates the flexibility Blender has, and to have such capability at the palms of your hand for free, is just mind-boggling (at least for me it is).